
This post will go over the steps needed to set up an HTTPS certificate for you web application using certbot and an NGINX proxy.
The web application in my case is ghost (node.js content management system) but the below should work for any web application as long as you have the knowledge and capability to expose your web application on ports other then 80 and 443.
Step 1 - set up certbot on your server and generate a certificate
If your web application does not have an HTTPS certificate most browsers will block users and display something like the following message.
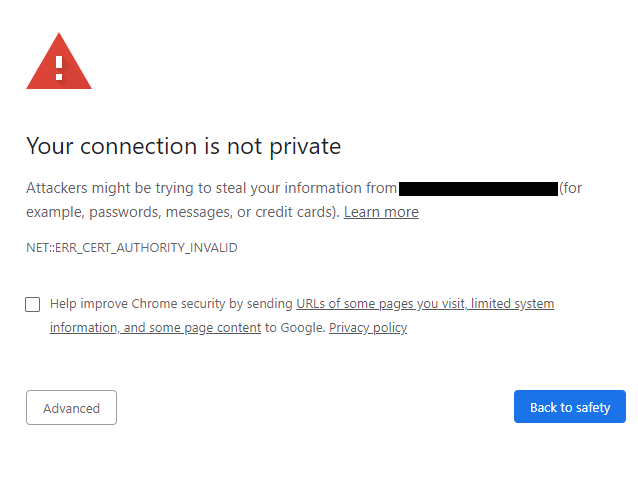
This happens because your web application does not have a valid and registered HTTPS certificate. Luckily these can be generated quite easily using free utilities, one of these is certbot. Certbot is a tool you can download on your server and in a few seconds register your domain and generate a valid certificate.
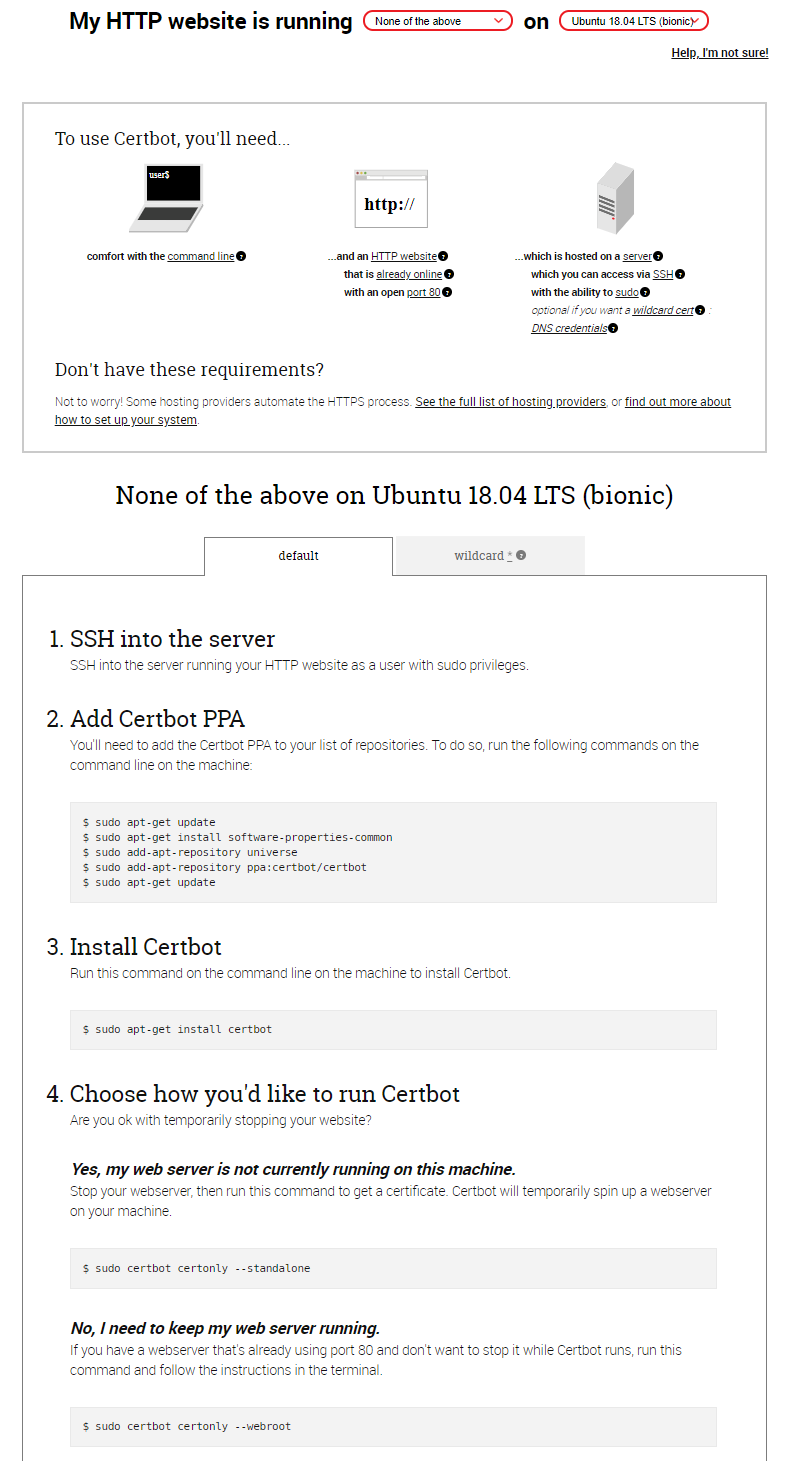
On the certbot site you can choose a type of web server and operating system you are running and the site will give you a set of step by step instructions for generating a certificate. In this example I will use Ubuntu 18.04 as it is the most popular Linux OS. For the server I will use none of the above as this is the simplest and most dynamic form of certificate generation. Here were my instructions as presented by certbot.
I installed certbot as instructed using the below.
sudo apt-get update
sudo apt-get install software-properties-common
sudo add-apt-repository universe
sudo add-apt-repository ppa:certbot/certbot
sudo apt-get update
sudo apt-get install certbot
Instead of playing with the webroot of my web application I recommend stopping your web server and running the standalone option. Before proceeding ensure your web application is stopped. You can validate that you have successfully done this using: sudo netstat -ltnp | grep -w '80'. If this returns anything your application is running and as a last resort you can kill it with the kill pid command.
When generating the certificate you will be asked for the domain and subdomains names you are registering. Even if you don't have any subdomains you should still register the www subdomain. In my case I will be registering theappliedarchitect.com and www.theappliedarchitect.com. You should see the following if the certification was successful.
$ sudo certbot certonly --standalone
Saving debug log to /var/log/letsencrypt/letsencrypt.log
Plugins selected: Authenticator standalone, Installer None
Please enter in your domain name(s) (comma and/or space separated)  (Enter 'c'
to cancel): theappliedarchitect.com www.theappliedarchitect.com
Obtaining a new certificate
Performing the following challenges:
http-01 challenge for theappliedarchitect.com
http-01 challenge for www.theappliedarchitect.com
Waiting for verification...
Cleaning up challenges
IMPORTANT NOTES:
 - Congratulations! Your certificate and chain have been saved at:
   /etc/letsencrypt/live/theappliedarchitect.com/fullchain.pem
   Your key file has been saved at:
   /etc/letsencrypt/live/theappliedarchitect.com/privkey.pem
   Your cert will expire on 2020-05-30. To obtain a new or tweaked
   version of this certificate in the future, simply run certbot
   again. To non-interactively renew *all* of your certificates, run
   "certbot renew"
 - If you like Certbot, please consider supporting our work by:
   Donating to ISRG / Let's Encrypt:   https://letsencrypt.org/donate
   Donating to EFF:                    https://eff.org/donate-le
If you see the below port 80 is being used by another application, follow the instruction above to identify the culprit and terminate it.
$ sudo certbot certonly --standalone
Saving debug log to /var/log/letsencrypt/letsencrypt.log
Plugins selected: Authenticator standalone, Installer None
Please enter in your domain name(s) (comma and/or space separated)  (Enter 'c'
to cancel): theappliedarchitect.com www.theappliedarchitect.com
Obtaining a new certificate
Performing the following challenges:
http-01 challenge for theappliedarchitect.com
http-01 challenge for www.theappliedarchitect.com
Cleaning up challenges
Problem binding to port 80: Could not bind to IPv4 or IPv6.
At this point the certificates should be on your server with the location indicated by the certbot output. In my case they are in the /etc/letsencrypt/live/theappliedarchitect.com/ folder.
The next step will cover setting up a proxy to listen on port 443 and 80, provide the correct certificate and direct traffic to the correct web application. You don't need to continue if you are happy setting up generated certificate directly on your web app.
Step 2 - set up NGINX
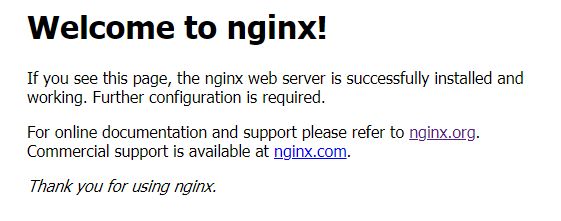
If you like me have several web applications running on the same server or if you want to standardize your certificate setup process regardless of web application type. Start by installing NGINX (if its not already included in your distribution) sudo apt install nginx
You can verify the install by using a browser to navigate to the domain you just registered and you should see something like the below.
NGINX routing is managed using configuration files. These are usually managed in the /etc/nginx/sites-available directory and deployed as links to the /etc/nginx/sites-enabled folder. You will noticed that there is a default configuration file present by default, we will start by removing the link from the site-enabled folder.
sudo rm /etc/nginx/sites-enabled/default
Next we need to create a new configuration file to direct both HTTP and HTTPS traffic to our web application. I will call my config file blog but you can use any name that is relevant for your purpose. Create the file and link it to the enabled folder.
sudo touch /etc/nginx/sites-available/blog
sudo ln -s /etc/nginx/sites-available/blog /etc/nginx/sites-enabled/blog
These configuration files can get very complicated but we will keep ours bare bones. The file will have two server mappings, one for port 80 (HTTP) and one for port 443 (HTTPS) where we will link our newly generated certificate. Make sure you replace all instances of theappliedarchitect.com with your domain name. Note the SSL certificate file paths, if you moved yours from the defautl folders you might need to update these as well. My blog runs on port 2368 make sure you update the port to reflect the internal port your web application will be running on.
server {
    listen 0.0.0.0:80;
    server_name theappliedarchitect.com;
    access_log /var/log/nginx/theappliedarchitect.com.log;

    location / {
        proxy_set_header X-Real-IP $remote_addr;
        proxy_set_header HOST $http_host;
        proxy_set_header X-NginX-Proxy true;

        proxy_pass http://127.0.0.1:2368;
        proxy_redirect off;
    }
}


server {
        server_name theappliedarchitect.com;
        listen 443 ssl;

        location / {
                proxy_pass      http://127.0.0.1:2368;
                proxy_set_header    X-Real-IP $remote_addr;
                proxy_set_header    Host      $http_host;
                proxy_set_header X-Forwarded-Proto https;
                proxy_set_header X-Forwarded-For $proxy_add_x_forwarded_for;

        }

        ssl_certificate     /etc/letsencrypt/live/theappliedarchitect.com/fullchain.pem;
        ssl_certificate_key /etc/letsencrypt/live/theappliedarchitect.com/privkey.pem;
        ssl on;

}
All you have to do now is restart the NGINX service and it should both provide the certificate and direct traffic to your underlying application.
sudo service nginx restart

One last thing to mention is that the certificates provided by certbot are only valid for 3 months and must be renewed before expiry (the drawback of using a free service). Certbot will send you reminder emails to renew your certificate when the time comes. In a future post I will outline how this renewal can be automated!